Visual studio code
Visual studio code (VS code) is a powerful IDE for programming that can be used to work on projects. It is lightweight and has a lot of features that can help you develop your codes. It can be configured with CMake Tools extension to enable direct interface with CMake functionalities.
This tutorial provides instructions to configure VS code IDE to compile and simulate Robotran C projects.
Visual studio code - Installation
VS code can be downloaded from https://code.visualstudio.com/download and installed by following the instructions provided by the tool.
C/C++ extension pack - Installation
VS code provides an extension package for programming in C or C++. This package, C/C++ extension pack, contains three VS code extensions:
C/C++: adds the language support for developing in C and C++ (IntelliSense and debugging)
C/C++ Themes [optional]: provides a theme extension to VS code that closely matches Visual Studio themes and includes colors for many of the new scopes.
CMake Tools: provides the native developer with a full-featured workflow for CMake-based projects in VS code.
You can install the entire C/C++ pack at once or install the extensions one by one. To do so, open VS code:
Click on the “Extension” button in the primary side bar (located on the left by default) (1).
Search for the extension you want to install (e.g., C/C++) (2).
Install the extension by clicking on the appropriate button (3 or 3’).

C/C++ extensions installation process
REMARK:
The figure shows the C/C++ extension, not the complete extension pack. Do not forget to also install CMake Tools.
CMake Tools - Configuration
The CMake Tools extension relies on two ways to configure CMake (i.e., 2 ways to provide information about your system’s compiler to CMake):
through CMake Presets,
through CMake Kits/Variants.
As using CMake presets is the recommended way for configuring CMake
Tools according to the reference tutorial (accessible
here), the
following tutorial will only consider this option. To avoid any
confusion, we strongly advise you to set the CMake Tools extension
options cmake.useCMakePresets to “always” and
cmake.enableAutomaticKitScan to “false”. These options (as all
other options) can be changed either:
by using the VS code settings UI,
or through the JSON setting file.
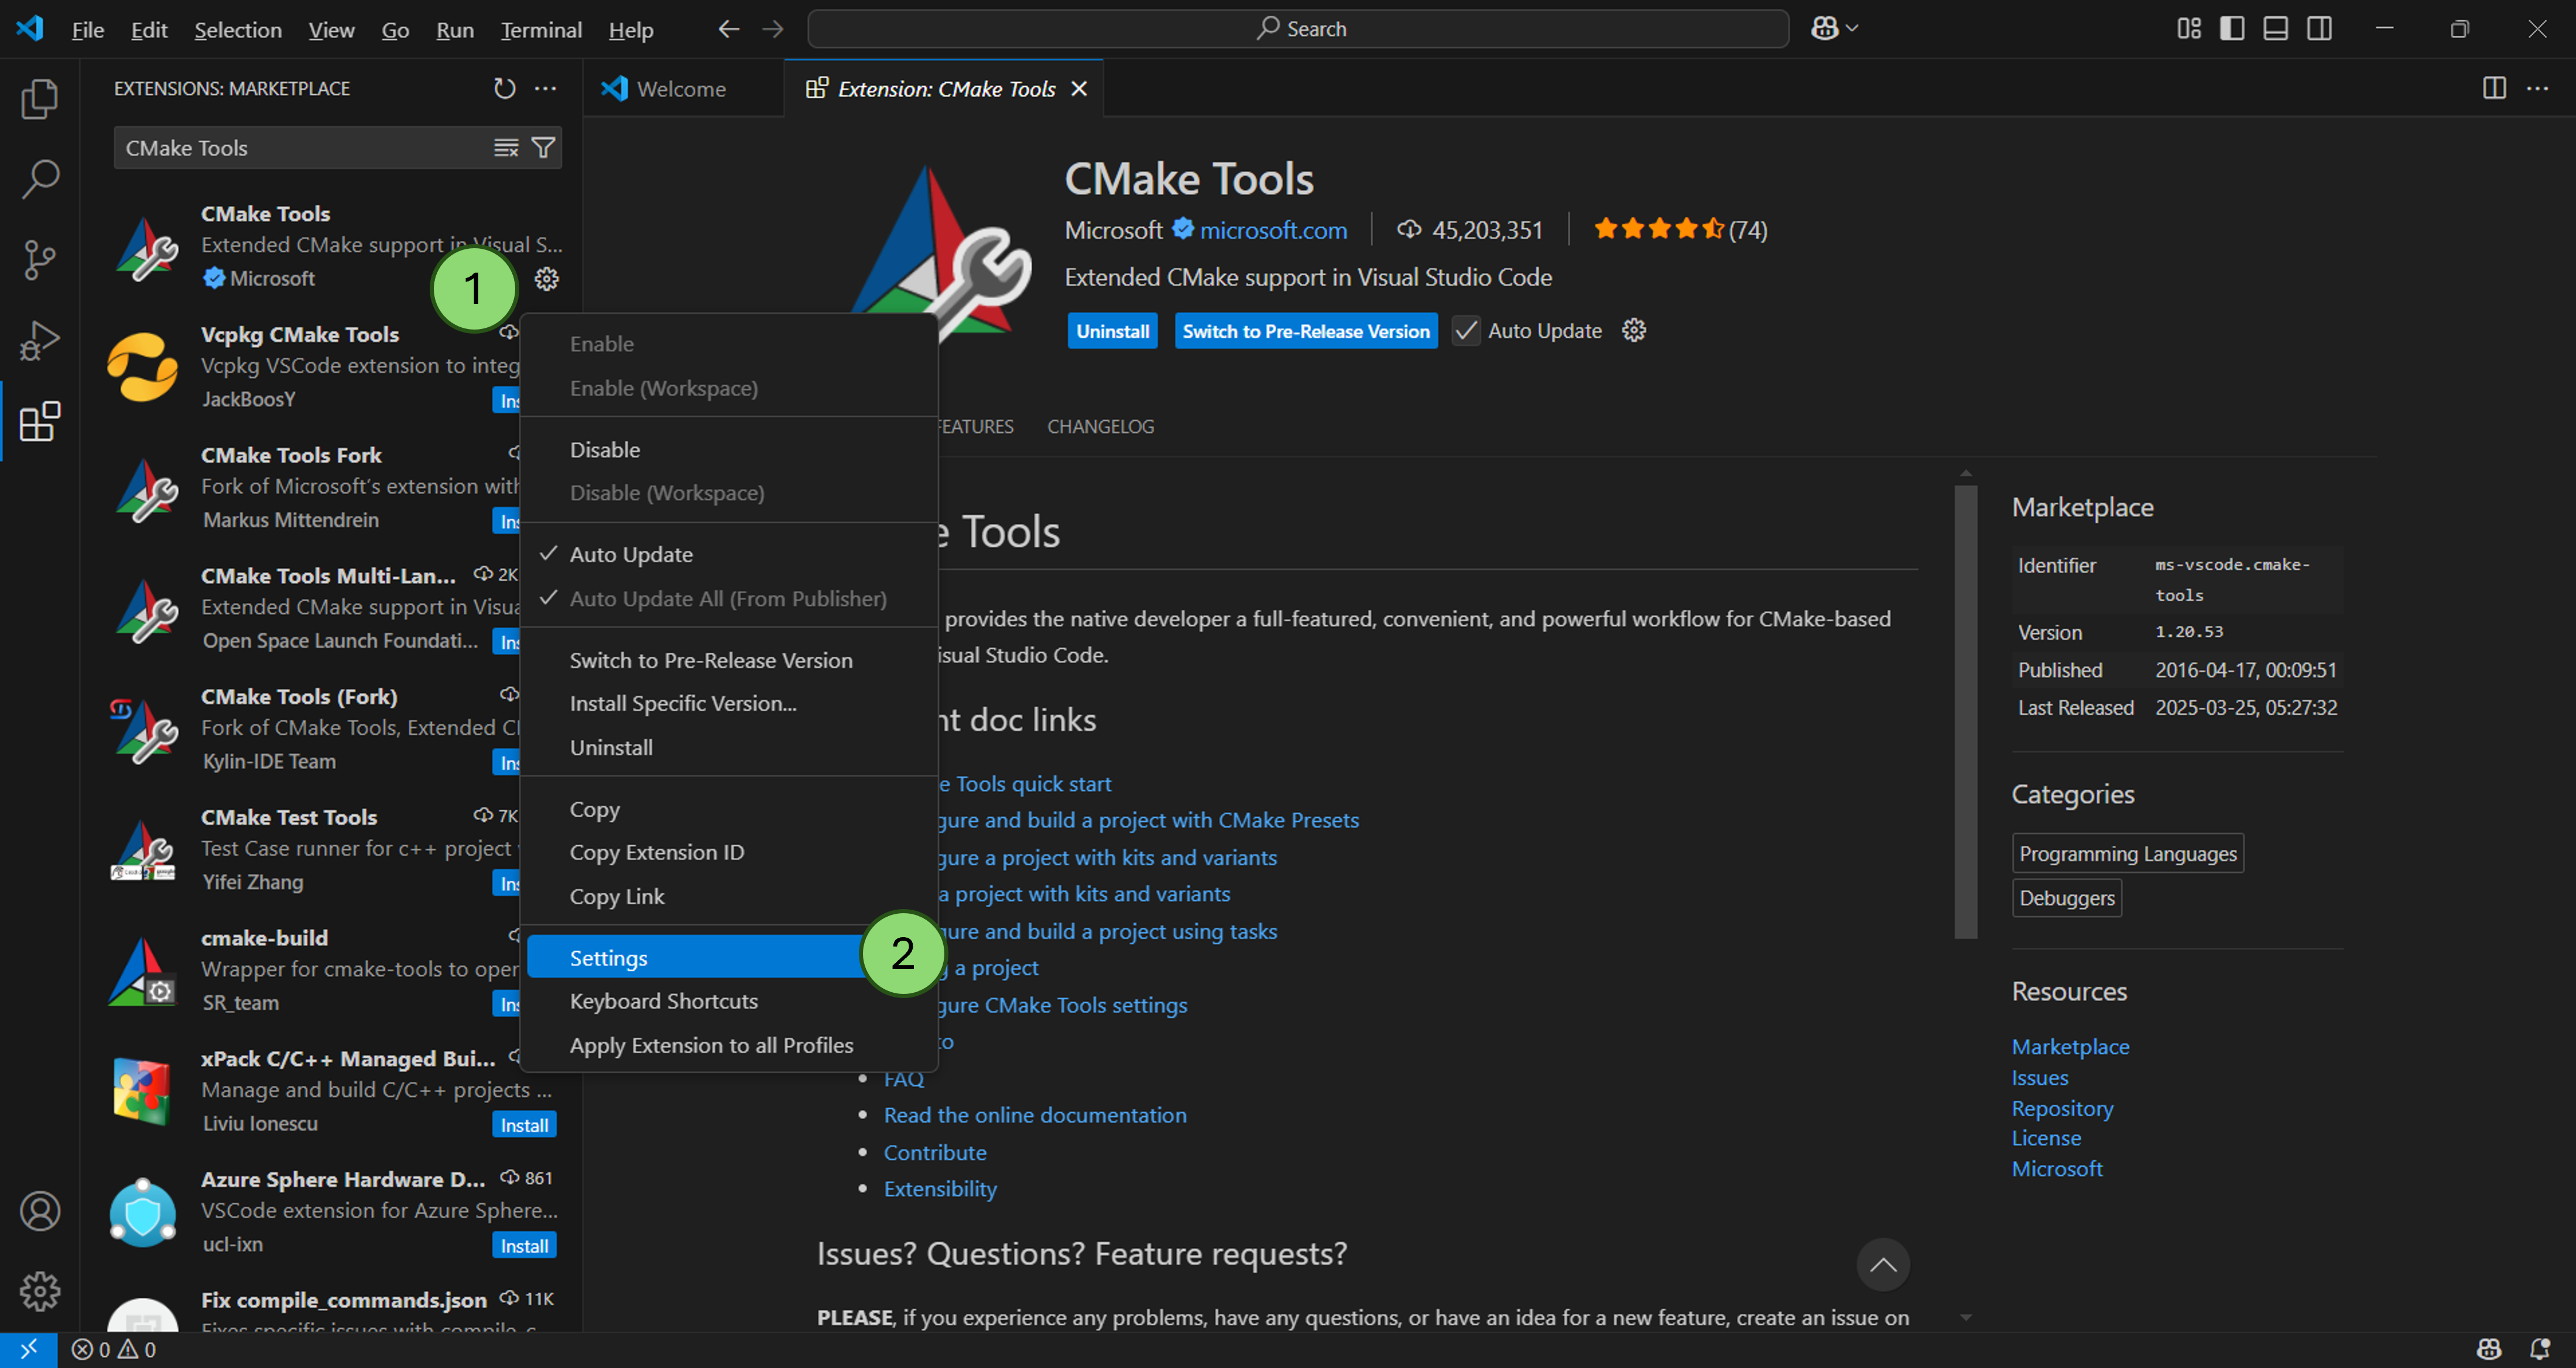
The VS code user settings UI can be triggered either through the command
palette (Ctrl + Shift + P) and selecting the “Preferences: Open
Setting (UI)” command or by clicking on the gear symbol next to the
extension on the “Extension” panel.
CMake Tools extensions settings
The JSON settings file can be opened by using the command palette
(Ctrl + Shift + P) and selecting the “Preferences: Open User
Settings (JSON)”.
We also recommend to set the options cmake.configureOnEdit and
cmake.configureOnOpen to “false” to avoid uncontrolled
configuration of your project by the extension.
Finally, Robotran projects have a common structure (see Folder
structure).
Therefore, we also recommend to set the default path to the
${sourceDirectory} to both "${workspaceFolder}/" and
"${workspaceFolder}/workR". This can be done in the JSON’s VS code
configuration file by adding the following setting:
"cmake.sourceDirectory": [
    "${workspaceFolder}/",
    "${workspaceFolder}/workR/"
],
REMARK:
If you experience switching issues between the two paths of the
cmake.sourceDirectoryarray, go check the ‘tips & tricks’ section, here.
CMakePreset - How to? for Robotran projects
By using CMake Tools extension, the user will not have to manually use
the command cmakeand cmake --build to configure and generate
their solution. Those commands will be called by VS code using buttons.
Yet, the use of buttons does not allow to provide options to CMake
during the configuration and generation steps. To bypass this
limitation, we recommand to use CMake
Presets.
CMake Presets are JSON files (named CMakePresets.json or
CMakeUserPresets.json) used to provide configuration settings to build
projects. They are a functionality of CMake and used by VS code through
the command flag --preset <preset_name> given to the cmake
and/or cmake --build (done automatically by CMake Tools extension,
so transparent for the VS code user). They can be automatically
generated by CMake Tools using the command “CMake: Add Configure Preset”
through the VS code command palette (notice that this functionality is
automaticaly triggered when opening a project where no CMakePreset.json
was found). Using the option:
“Custom”: it will generate a “CMakePreset.json” file in your
${sourceDirectory}(generic path variable used by CMake Tools extension to define the path where the CMakeList.txt file of your project must be stored) folder containing the required fields pre-filled with default values;“Create from compiler”: it will scan your computer to find the usable compiler. Once you have selected the dedicated compiler, CMake Tools extension will generate the CMakePreset.json file with the required compiler information.
“Toolchain File”: NOT CONSIDERED IN THIS TUTORIAL.
In a CMake Presets file we find at least two main fields:
The
versionfields: A required integer representing the version of the JSON schema.The
configurePresetsfields: An optional array of Configure Preset objects. This is allowed in preset files specifying version 1 or above.
In the configurePresets fields you will enter all the options
required for the project configuration. If an option is not mentioned
CMake will automatically detect the value to use. CMake variables such
as CMAKE_BUILD_TYPE, CMAKE_INSTALL_PREFIX and
CMAKE_PREFIX_PATH can be modified in the cacheVariables field
itself contained in the configurePresetsfield.
The buildPresets can also be used to provide building objects mainly
useful for Multi-Config generator such as Visual Studio generators. If
you use a Single-Config generator (such as MakeFile on Linux), we advise
you not the add the build preset field (expect if you know what you are
doing) and to use the default option of CMake during the building
process.
// TODO: Add a CMakePresets.json example here. Use the code insertion canevas.
TIPS:
Visual Studio generators and Ninja Multi-Config can generate multiple configurations (Debug, Release, …) at once with
CMAKE_CONFIGURATION_TYPESinstead of only one configuration withCMAKE_BUILD_TYPE. Therefore, by design the configuration to build must be defined through the building options (and not by theCMAKE_BUILD_TYPEoptions for the configuration). This can be achieved by specifying theconfigurationoptions in thebuildPresetsassociated with the dedicated configure preset (this is done by setting the configure preset name in theconfigurePresetoptions).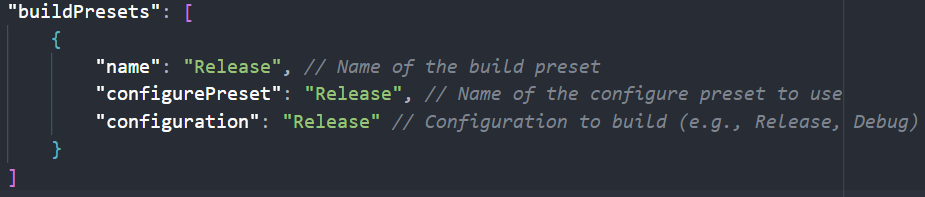
Build preset field contained in the CMakePreset.json
Compiler - Installation
Day-to-day usage
Using VS code, multiple options are possibles to open your Robotran project as your VS code workspace:
with the “open folder” option in VS code (File->Open Folder …)
using the
codecommand in a terminal console
code <path/to/your/project>
Through the code command option, the path to your project can be
absolute or relative from the current directory of your terminal
session.
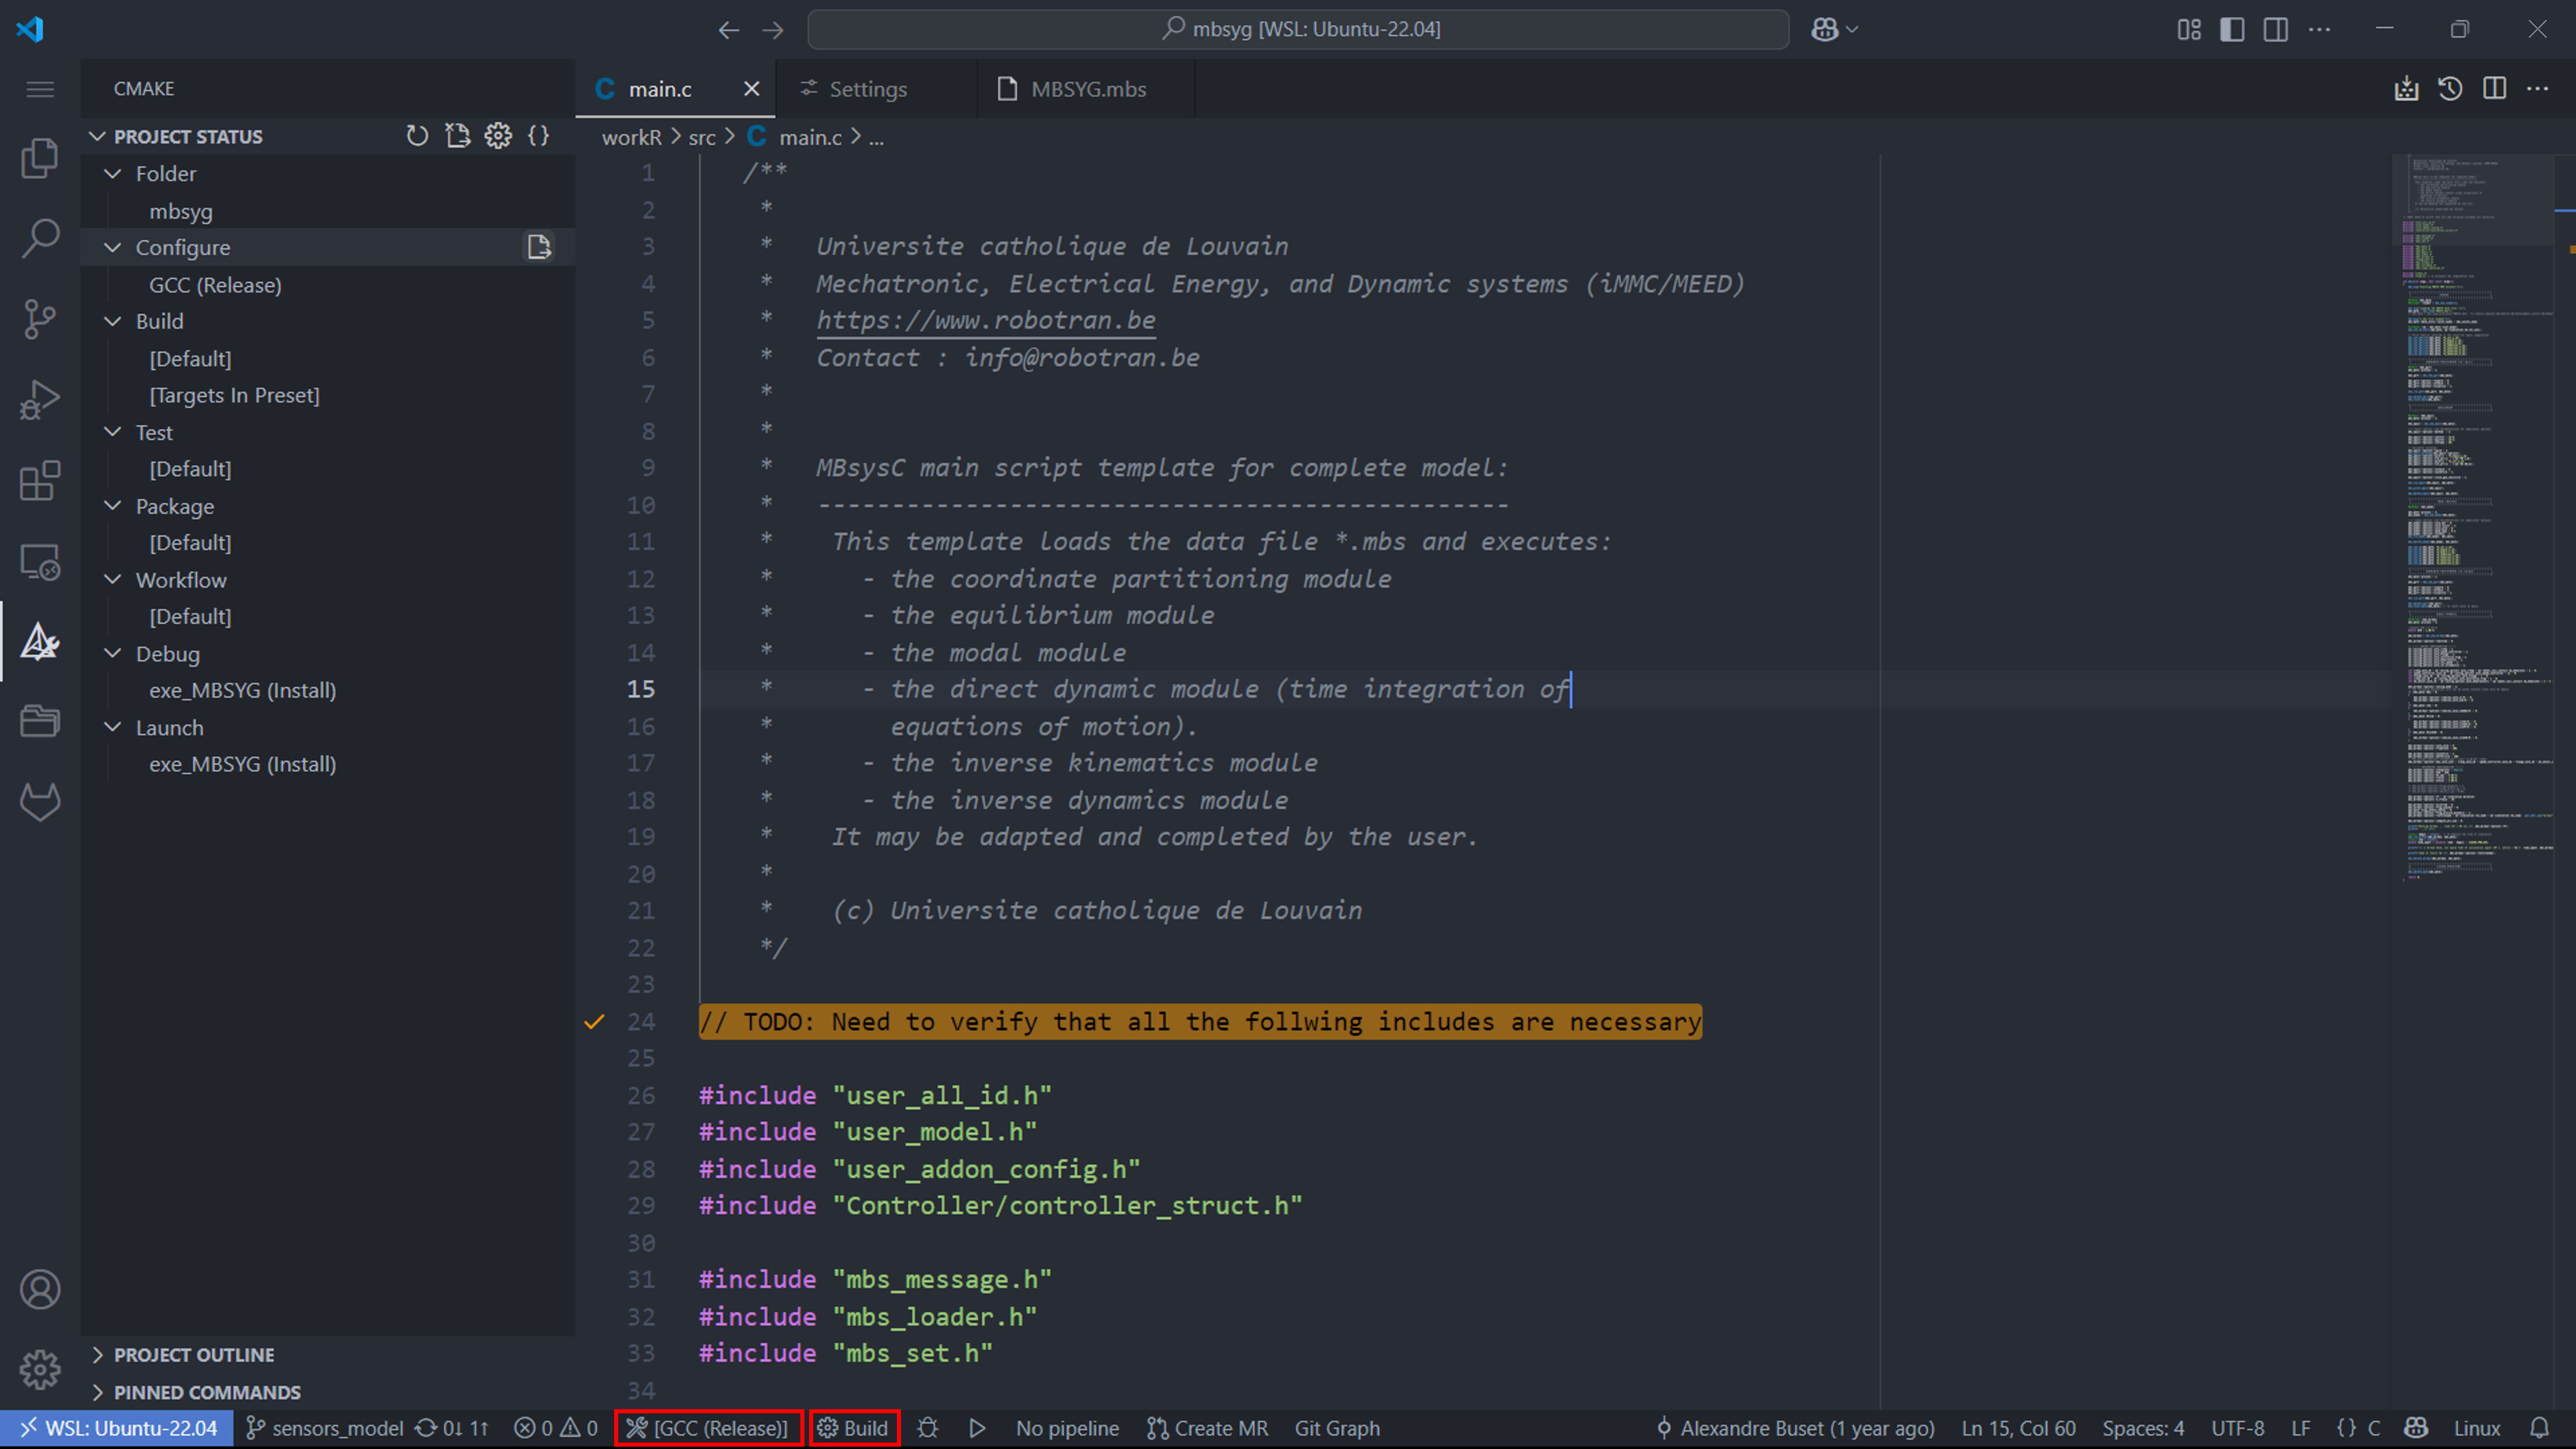
When you need to compile your project, you can use the CMake Tools extension to configure and build your project.
First make sure that the CMake Tools extension selected the correct
active folder as its ${sourceDirectory} (if it is not the case,
check this solution). If CMake Tools
finds the CMakePreset.json file and displays the CMake Tools extension
icon in the left panel then it has selected the correct folder.
CMake Tools extension icon
If the extension icon is not displayed then either the CMakePreset.json
file does not exist yet or the active folder of the CMake Tools
extension is not the correct one. The active folder selected by CMake
Tools can be changed through the command palette (Ctrl + Shift + P)
and selecting the “CMake: Select Active Folder” command.
A CMakePreset.json file can be created thanks to the CMake Tools
extension by using the command palette (Ctrl + Shift + P) and
selecting the “CMake: Add Configure Preset” command (as already
explained above).
WARNING:
The CMakePreset.json file must be created in the same folder as the CMakeList.txt file of your project.
Then, when the correct CMakePreset.json file is selected, and after configuring the CMake preset (see section CMakePreset - How to for Robotran projects?), you can configure and build your project by using:
The CMake Tools extension icon in the left panel of VS code (1) and selecting the “Configure” (2) or “Build” (3) option from the menu. The configure and build preset can be selected by clicking on the pen displayed next to the current preset name.
CMake Tools extension icon
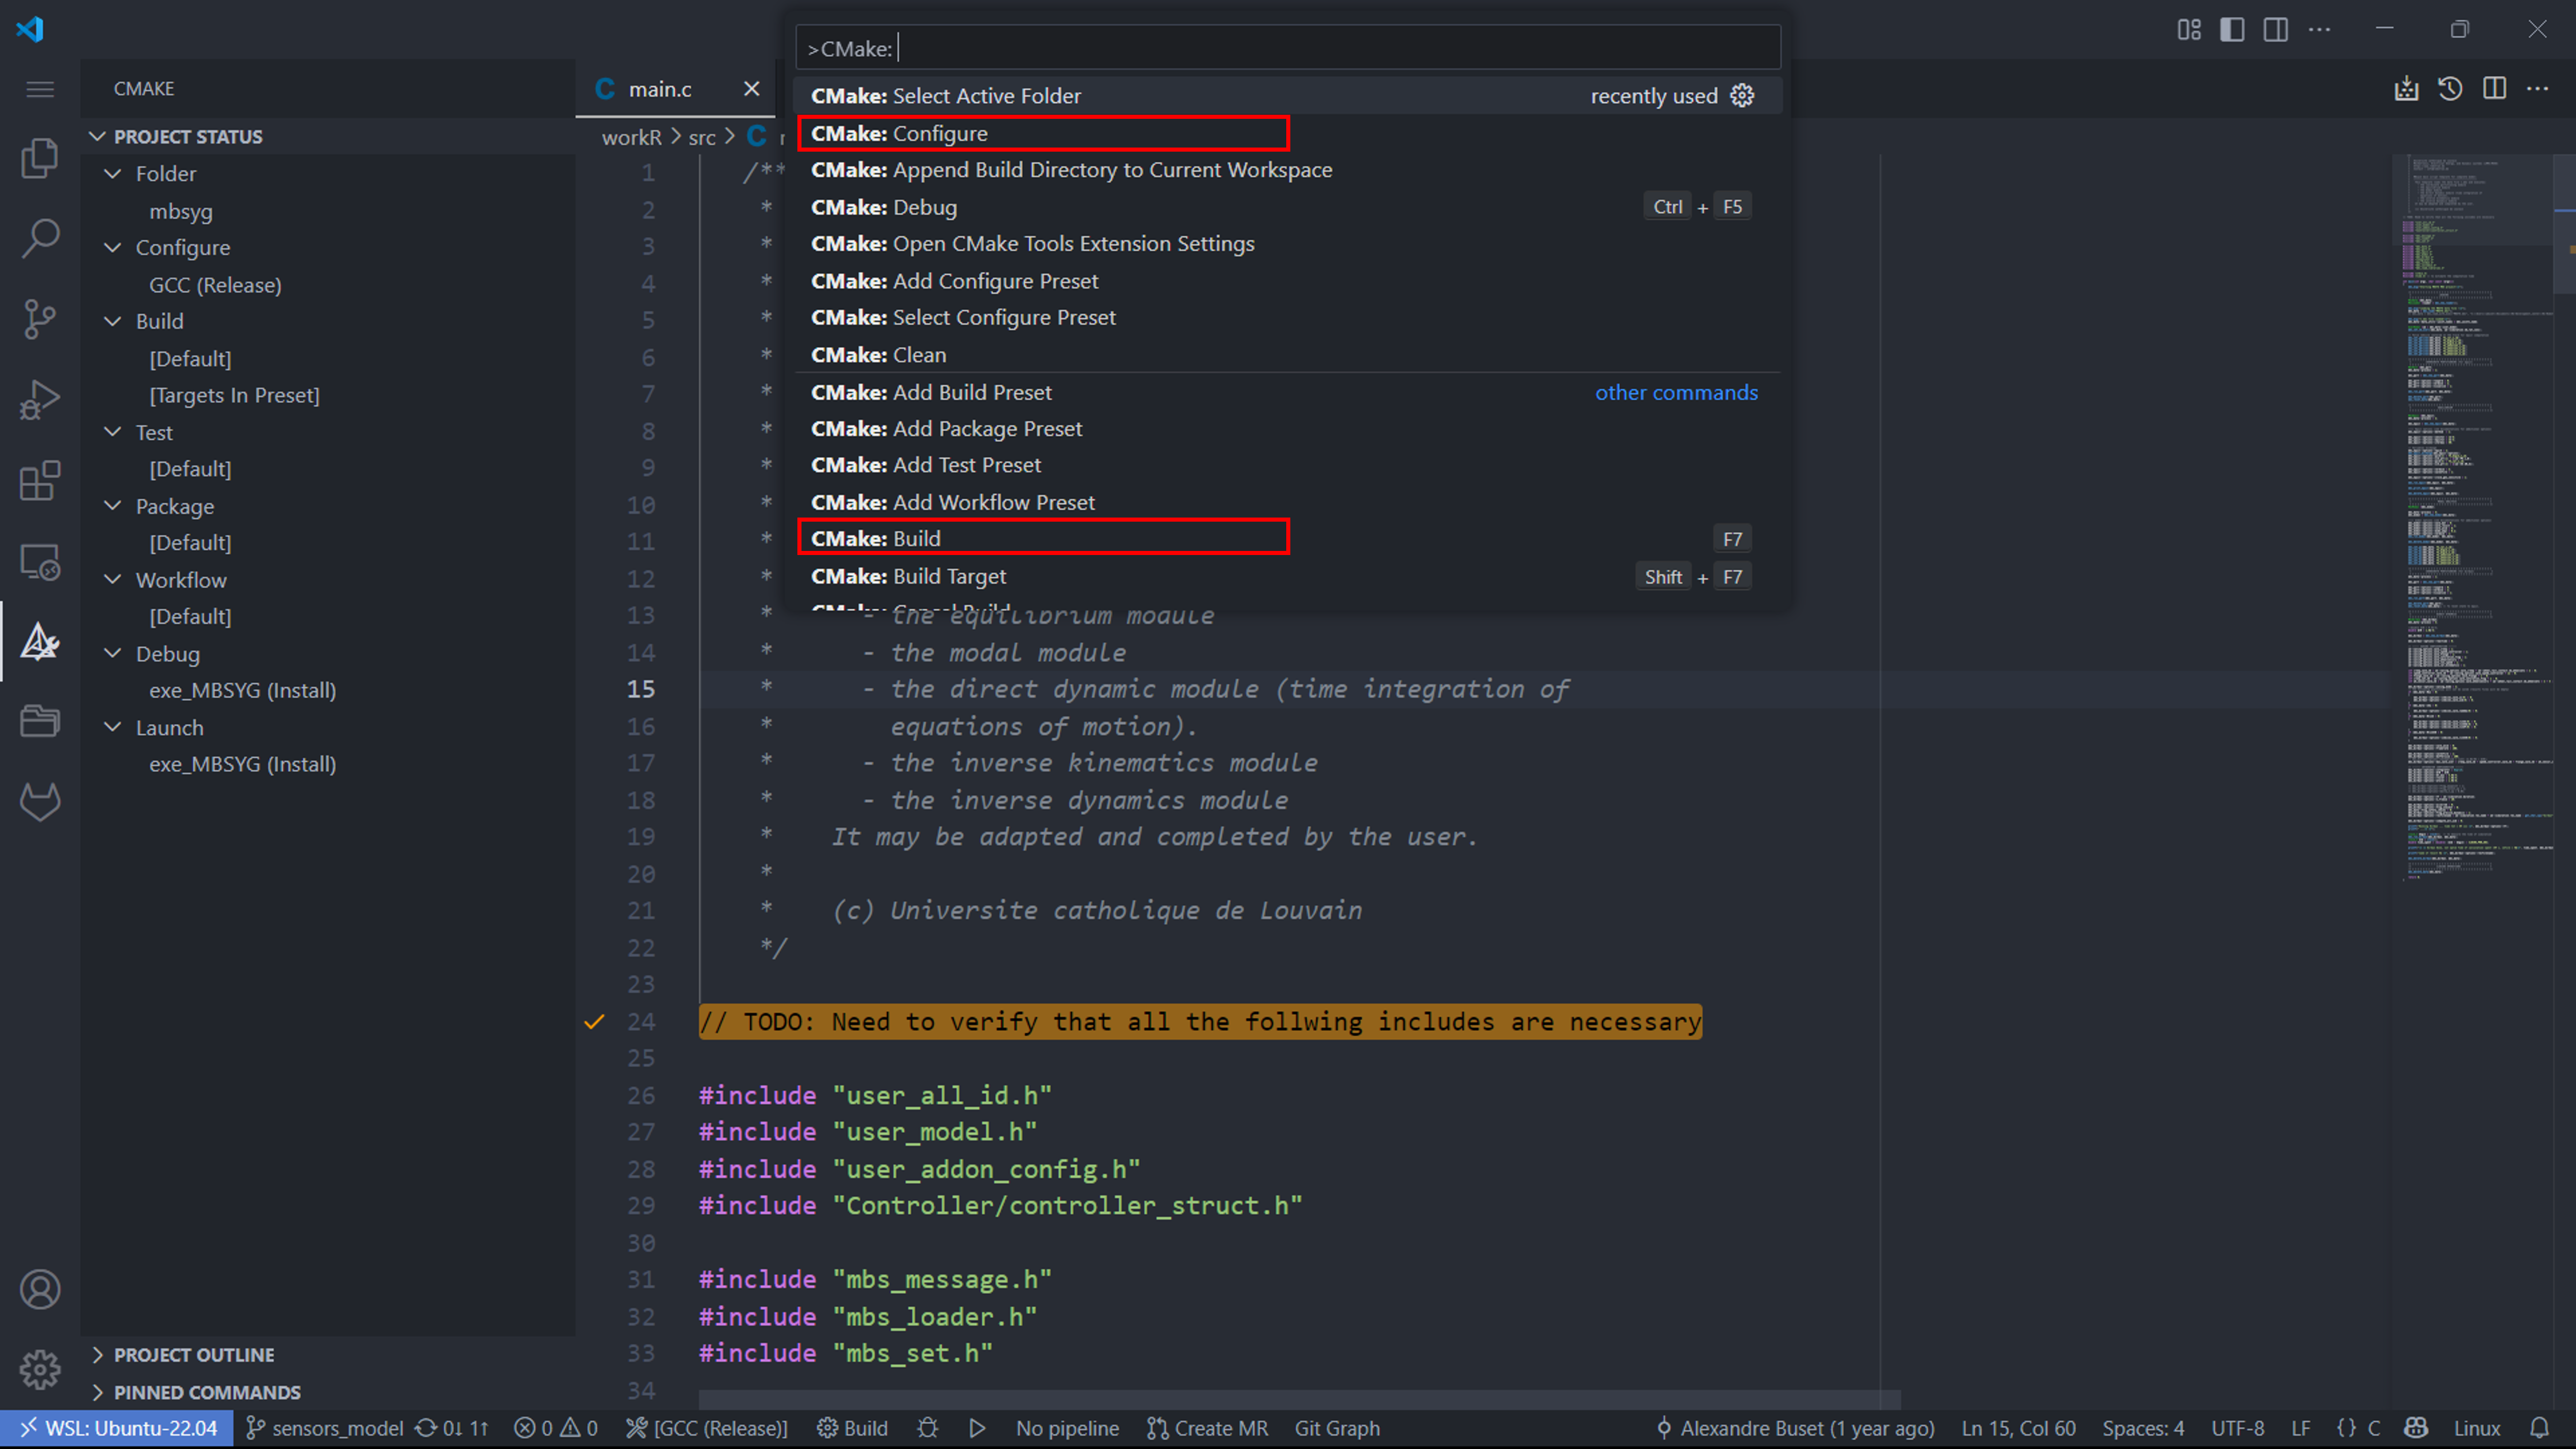
the command palette (
Ctrl + Shift + P) and selecting the “CMake: Configure” (or “CMake: Build”) command. The configure and build preset can be selected upstream by using the command “CMake: Select Configure Preset” or “CMake: Select Build Preset” respectively.
 ,
,
the CMake Tools extension buttons in the status bar of VS code (if their visibility was activated as described in the following article).
CMake Tools extension buttons in the status bar
Once the project solution is correctly build, you can run the simulation in debug or launch by using either the buttons from the CMake Tools extension tab on the left panel (1) and (2) or the buttons in the status bar (3) and (4) if their visility was activated.
Tips & tricks
Force cmake.sourceDirectory
If you experience any issue related to the cmake.sourceDirectory
selection in your workspace: e.g., the selected source directory
switches back to the first value of the cmake.sourceDirectory array
defined in the CMake tool settings (it can show up as CMake not finding
your CMakelists file for example). You can force the path of the source
directory for your current project using the VS Code workspace settings.
To do so, edit the ${workspace}/.vscode/settings.json file. Open it
either by:
opening it directly from your file explorer or terminal;
using the VS Code command palette and executing the command “Preferences: Open Workspace Settings (JSON)”.
This file controls all the VS Code options specific to your current project (it overwrites the global VS Code and user settings). Add the line:
"cmake.sourceDirectory": "path/to/your/source_directory",
You can of course use substitution variables such as
${workspaceFolder} which holds the path of the folder you opened in
VS Code. In robotran projects your source_directory is the workR folder,
so if you opened the main folder of the project with VS Code you will
set the variable to :
"cmake.sourceDirectory": "${workspaceFolder}/workR",